Find's Treasure Forums
Welcome to Find's Treasure Forums, Guests!
You are viewing this forums as a guest which limits you to read only status.
Only registered members may post stories, questions, classifieds, reply to other posts, contact other members using built in messaging and use many other features found on these forums.
Why not register and join us today? It's free! (We don't share your email addresses with anyone.) We keep email addresses of our users to protect them and others from bad people posting things they shouldn't.
Click here to register!
Need Support Help?
Cannot log in?, click here to have new password emailed to you
You are using an out of date browser. It may not display this or other websites correctly.
You should upgrade or use an alternative browser.
You should upgrade or use an alternative browser.
Minelab glue
- Thread starter Rob (IL)
- Start date
sovereign-fan
New member
hi rob
i have found this on the net, it may be of some help to you.....read the bottom paragraph on the glue.....
So firstly, you don't have to remove the control box off the upper battery pod/handle stem . That stays on. Taking the control box of the stem is usually done for reasons other than servicing the inside of the Explorer generation of detectors(Quarto included).
If you're sure it's the front control panel harness you might just want to simply get hold of a new one from Minelab. They or one of their dealers should sell you one.
It might be better to send the detector into Minelab to do this and I would recommend you do.
So be it on on your own head if you proceed with my instructions.
Remove the BATTERY.
Those four screws need to be removed and the front panel pulls away. Be VERY careful here.
Before are after the above procedure, I suggest you wrap the battery pod in some cloth and gently but firmly hold it in a vice in a clean well lighten area.
Occasionally earth your self or at least touch an earth to discharge static.
There are three PCB's. These are all attach to each other to the front panel. The first is the power supply. It is held in place by two sets of thin gold pins that need to be gently separated and held aside safely, out of the way but still attached to all the wires. I use tape to do this. In fact I usually wrap this up in a protective cover of bubble wrap. No cutting or de soldering required.............for now.
The next PCB requires you to do the same. CAREFUL TO NOT BEND ANY OF THE GOLD PINS ON ANY OF THE PCB's. PRY AND PULL AWAY EVENLY.
This is where you will find the push in place ribbon connector that attaches the control panel buttons to its relevant connections. This connector is not robust and must be removed and handle with care. You simply pull it out of it's slot.
The third PCB, the one that has the LCD mounted to it, has to be removed from it's plastic clips that are again part of the plastic front control panel.
They are prone to breaking IF over stretched. So, pry them aside with even gentle pressure and that PCB is free standing. Put it safely aside.
This will leave you with what is an inaccessible non user serviceable plastic control face panel with that ribbon wire hanging out of it.
The control panels buttons are a series of thin metal buttons that look like miniature dinner plates, two different sized ones and are the push down conductors of momentary switches. They are held down in precise locations by a very well stuck on Mylar. There are some extra vacant button positions that are a mystery as they are there for any future or past or other model use.( maybe they were put in by mistake)
If you succeed in removing this front Mylar transfer you'll end up doing so by putting the front control panel under duress unless you are extremely slow and careful to try and peel it off and even then, that might not save it. I suspect they must use a set jig and template for such precise assembly.The glue that is used hold that thin plastic firmly in place.
The Mylar film might peel off with some heat from a hair dryer but even that may not allow an easy removal without losing the position of those miniature metal dinner plates".
I forgot to mention though. You do not have to separate PCB1 and PCB2 to access the LCD PCB. You can keep those two together to get to the LCD board and remove it still attached to the control box front. That flat ribbon harness is actually part of a flexible PCB which is the base of the push button switches. Its place and glued in first to the white fascia of the control box front panel just prior to the Mylar transfer switch reference, the external part our finger push down onto , being glued on.
The tracks on this flexible plastic material are the conducting tracks and are not actually wires off the switch to the circuit boards as we would normally think. They are actually printed on the flexible plastic that gets pushed into that specialized connector on the middle PCB. Very difficult if not impossible to repair
The cam lock pin needs to be pushed out and that section needs to be dis-assembled.
I was told that in the later stages of production and in some instances of repair Minelab had taken to bonding the control box to the battery box shell with what could be super glue. Its mentioned in other past posts. This bonding of the control box to the split battery pod shell is super glue (then MAYBE injecting small amounts of acetate with a hypodermic needle or directing the flow of acetate to go between into the part where the control box meets the split shell might assist.
You would need to put the battery door end facing skyward and let gravity and time do the work with the acetate. Don't be too liberal with applying to much acetate but at the same time put in enough to dissolve the super glue. In the past there have been other efforts posted on how to remove the Explorer control box housing that have been glue in. Those actions in my opinion were a little drastic but if you're not to worried about it then you'll see what's possible.
Once you have managed to make this control box become un stuck you SHOULD be able to pry it off with a little(or a lot) of gentle persuasion.
Once I took off glued Xs control box from shaft thinking for future return option, but it never came back because Explorer original shaft is stupid.
To take off I used scalpel and simple device made from two wood planks and few long screws, one plank was on the empty control box top another on the handle under the control box, screws where in the sides control box.
To take off I used scalpel and simple device made from two wood planks and few long screws, one plank was on the empty control box top another on the handle under the control box, screws where in the sides control box.
When you screw screws one wooden plank will push rod another empty control box top.Rob (IL) said:Thanks but I can't picture the two blocks and screws.
OK as you say, the Minelab handle is stupid. I think so to or I wouldn't be doing the mod. But as I mentioned I don't want to cut the pod so it is reversible.
OK, say your SE quits working. You send to Minelab to repair. It turns out to be a broken wire at the battery contacts. Easy fix, I guess not. You mean to tell me they have to cut off the pod because it is glued to separate the handle. If so I hope I never have to send the SE in, STUPID.
OK, say your SE quits working. You send to Minelab to repair. It turns out to be a broken wire at the battery contacts. Easy fix, I guess not. You mean to tell me they have to cut off the pod because it is glued to separate the handle. If so I hope I never have to send the SE in, STUPID.

earthmansurfer
Active member
Rob - Well, this is an interesting thread for me as I'm doing an E-Trac mod as you know. I also might (I hope not) have to try to get the glued handle off.
If it is indeed glued with crazy glue, this is what comes to mind:
What Stasys was saying I think might work. My thinking is that you are going to need to SECURELY hold the base down in some kind of (unmarking) vice - be it pieces of wood or the like. A sharp but short movement of the handle might get the glue seal cracking. If you can get the glue even a little loose and then put some acetate (homeade from white vinegar and baking soda) inside and then get it to come completely loose. Perhaps their is even a better glue remover/weaker?
If I can't get the glue off I think I will just cut it off as I am not planning to return to the original set-up. If I ever sell the mod, I think it will sell better than the original anyway (as long as it is indeed balanced well and light).
Hope you figure it out,
Albert
Follow sovereign-fan's instructions. They are pretty good.
Disconnecting and reconnecting that ribbon connector is a real pain if it's not treated with care and if you break any of the gold pins then you can either replace them or just bridge those points with a wire around the pcbs.
Over the last few years, I've removed the control box from the handles of 3 other Explorers that had been glued in by what seems was most likely super-glue. Whatever it was, it dissolved with acetone:
1. Placed the Explorer handle in a vice(wrapped the handle in a cloth and didn't squeeze it too hard with the vice jaws) Doing this helps keep it in a firm position.
2. Heated most of the area where the control box and handle join, lightly with a hot air gun(hair dryer might work).
3. After it was warmed, in the first try on the first Explorer that needed this, the glue gave way and I managed to pull it apart with my bare hands, but with the other two I dabbed a small measured amount of acetone at the joins (as indicated by red arrows) with a cotton ear bud.
Saw the acetone seep in and travel in between the layers, that are the control box collar and the handle stem.I Let it soak for 5 minutes, re heated it again and the boxes slipped of rather easily.
Don't over do it with too much acetone and remember, acetone is flammable. You might even get away with using none or very little with just heating or maybe without.
In my first 2 mods cutting the control box and in one case , cutting the handle of Explorer X S's there was no glue to contend with but you either cut the wires for the battery, earphones and coil connector or at least de-solder the coil connector wires (unless you plan to use another alternative connector) or try to bring the Explorer's wires back to original. So cut them at their points of origin from their respective ends or cut them so that you can re solder extensions to where you want them to go on a version of your mod.
Cutting the control box might be a last resort but yes, it's the quickest. Cutting the handle as close to the control box (sacrificing the handle) is also a way that will help maintain the integrity of the internal of the control box but limit the way you mount the control box on a different handle/stem system. Perfect for waterproofing and making it a chest mounted version and you've no need to open the control box at all. It can get complicated and in every instance of the mods I've done, it's always been a case of cross my fingers and hope it works(I've killed 2 Explores so far..sniff..sniff).
Hope it works out for you either way IF you try. .
.
David Di
Disconnecting and reconnecting that ribbon connector is a real pain if it's not treated with care and if you break any of the gold pins then you can either replace them or just bridge those points with a wire around the pcbs.
Over the last few years, I've removed the control box from the handles of 3 other Explorers that had been glued in by what seems was most likely super-glue. Whatever it was, it dissolved with acetone:
1. Placed the Explorer handle in a vice(wrapped the handle in a cloth and didn't squeeze it too hard with the vice jaws) Doing this helps keep it in a firm position.
2. Heated most of the area where the control box and handle join, lightly with a hot air gun(hair dryer might work).
3. After it was warmed, in the first try on the first Explorer that needed this, the glue gave way and I managed to pull it apart with my bare hands, but with the other two I dabbed a small measured amount of acetone at the joins (as indicated by red arrows) with a cotton ear bud.
Saw the acetone seep in and travel in between the layers, that are the control box collar and the handle stem.I Let it soak for 5 minutes, re heated it again and the boxes slipped of rather easily.
Don't over do it with too much acetone and remember, acetone is flammable. You might even get away with using none or very little with just heating or maybe without.
In my first 2 mods cutting the control box and in one case , cutting the handle of Explorer X S's there was no glue to contend with but you either cut the wires for the battery, earphones and coil connector or at least de-solder the coil connector wires (unless you plan to use another alternative connector) or try to bring the Explorer's wires back to original. So cut them at their points of origin from their respective ends or cut them so that you can re solder extensions to where you want them to go on a version of your mod.
Cutting the control box might be a last resort but yes, it's the quickest. Cutting the handle as close to the control box (sacrificing the handle) is also a way that will help maintain the integrity of the internal of the control box but limit the way you mount the control box on a different handle/stem system. Perfect for waterproofing and making it a chest mounted version and you've no need to open the control box at all. It can get complicated and in every instance of the mods I've done, it's always been a case of cross my fingers and hope it works(I've killed 2 Explores so far..sniff..sniff).
Hope it works out for you either way IF you try.
 .
.David Di
earthmansurfer
Active member
Rob - How are you going to mount the pod onto the shaft? The Explorer or E-Trac have the coil cable inside the pod opening (as in your picture), so unless you take off the coil connector and insert a tube into the opening, you will have to mount the pod onto a shaft. You are using and S rod I think and I am using a X-Terra 705 straight shaft. I am looking to mount the pod onto the top of the X-Terra handle (so no need to remove the coil connector, I'll just hot glue it in the opening) - I have a few ideas but need some proper tools or the help of someone with them...
Albert
Albert
With first explorer xs I was using WD 40, to help loose shaft, but after I learned that is nothing to spare in original explorer shaft and started to use cutting technique.
Albert from my experience modified explorers usually sells less then original in bebay, looks like buyers dont understand what is better.
Albert from my experience modified explorers usually sells less then original in bebay, looks like buyers dont understand what is better.
I built a tapered piece that mimics the shape of the old handle insert, it is tapered. Now when the pod is pushed on fiction holds it on. I then just use one screw to anchor.
I actually can use the connector as is but it is just plain ugly. It just look so much better to use the CB connector on the back of the pod like everyone has done.
The S handle is lighter than the Xterra handle. Think about it, if you sawed off your handle you would have my S rod.
I actually can use the connector as is but it is just plain ugly. It just look so much better to use the CB connector on the back of the pod like everyone has done.
The S handle is lighter than the Xterra handle. Think about it, if you sawed off your handle you would have my S rod.
earthmansurfer
Active member
Thanks for the comment Stasys - I wondered about the resale of a mod. I will try to keep everything in resale condition should the need arise.
Rob - I thought of the tapered fit, just like you said. I thought to have the taper turn down at 90 degrees in the form of a rod and then I can just slide it into the X-Terra handle and it even has a screw hole on the side to secure it with.) Post a picture when you get a chance. If you are keeping the coil wire in it's original configuration (like I am) you would then need a hollow tapered piece. I don't own many tools and this part will be done by neighbors if possible. But I will figure something out.
Albert
The entire setup is sprayed with bed liner. It's tough and if it adds weight it don't care.
[attachment 247220 007.JPG][attachment 247221 008.JPG][attachment 247222 009.JPG][attachment 247223 010.JPG]
Right now as I said before I'm 11 oz lighter right now. I'm still waiting to see how much lighter your new battery is. I'm hoping it is a lot.
[attachment 247220 007.JPG][attachment 247221 008.JPG][attachment 247222 009.JPG][attachment 247223 010.JPG]
Right now as I said before I'm 11 oz lighter right now. I'm still waiting to see how much lighter your new battery is. I'm hoping it is a lot.
earthmansurfer
Active member
Thanks Rob. What is the material and what is it that you put on the rod, below the S handle, where the pod will mount? I might have to do something similar if I can can't get someone to fabricate an aluminum mount.
Albert
Albert
sovereign-fan
New member
hi guys.
here is some pictures of some moded explorers for you lot to look at, it my help give some ideas on what ways to go with any modifacations you may have in mind.
i'm sure the last one must of been intended as a joke.....maybies not?.......
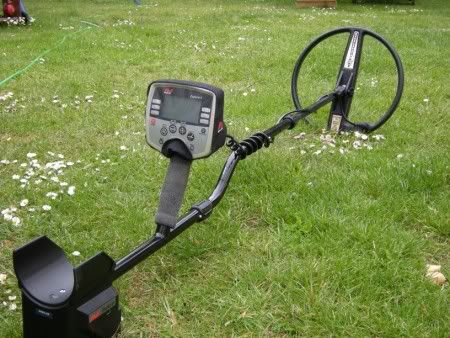
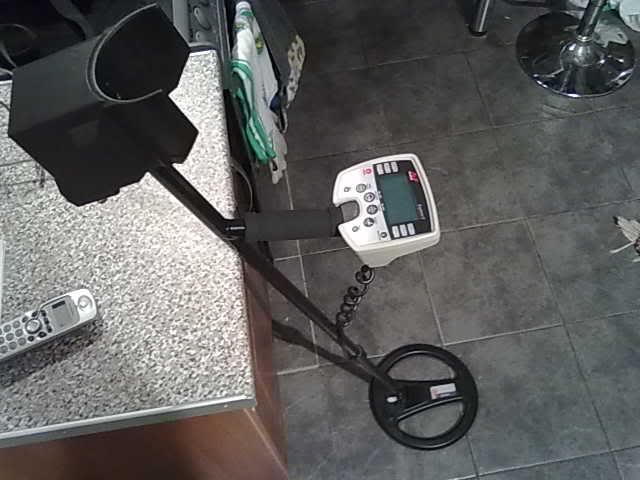

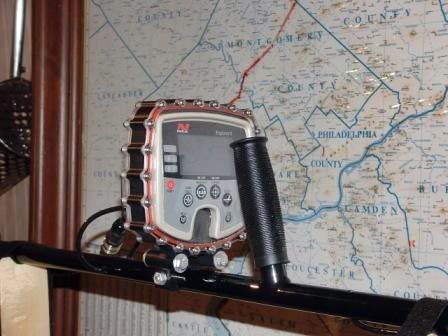
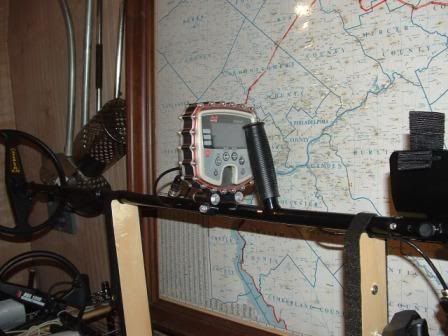

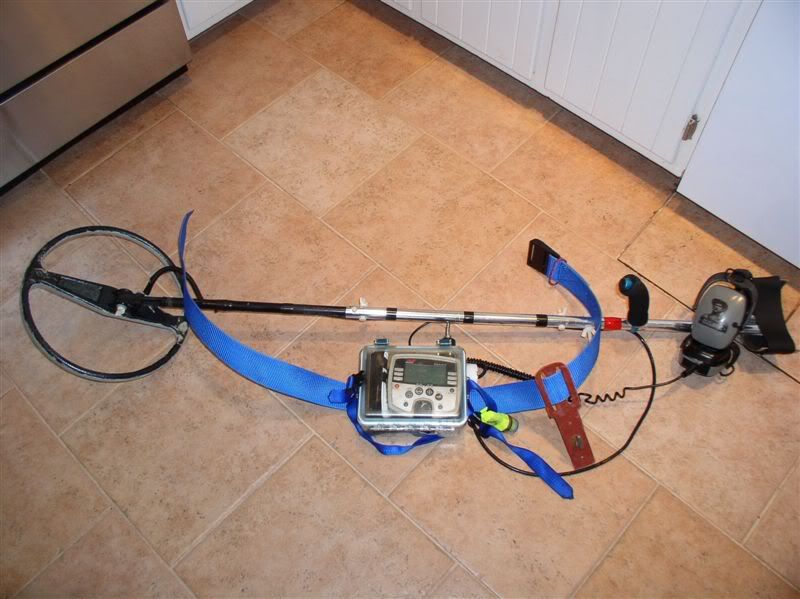
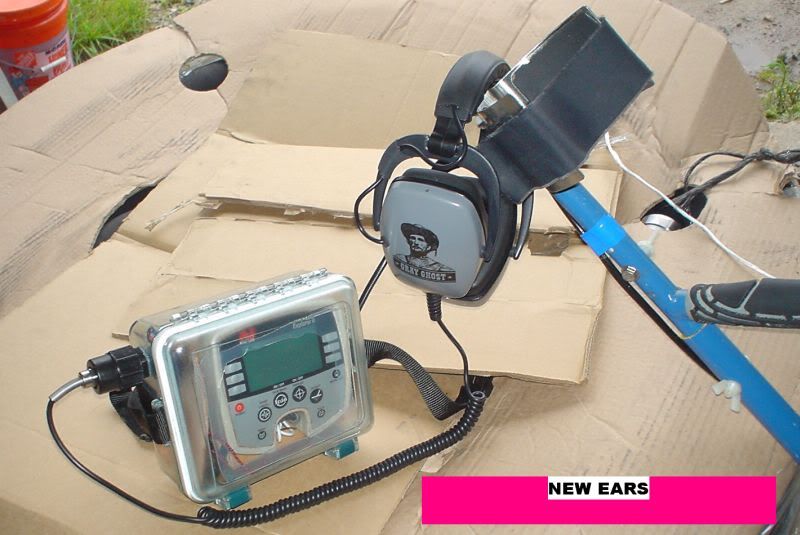
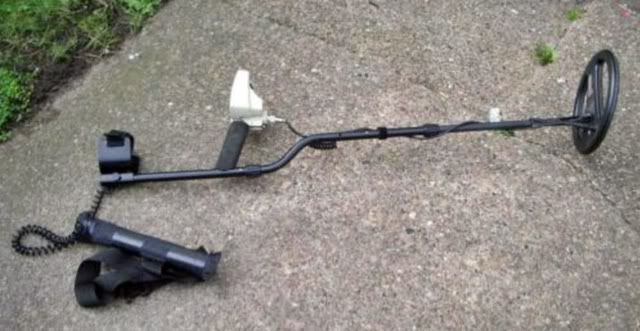
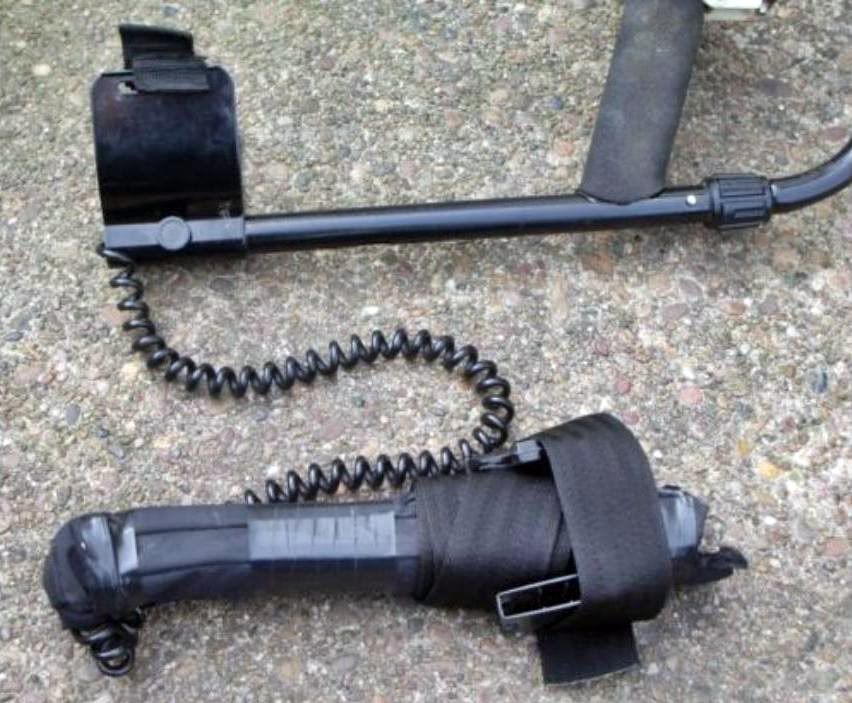

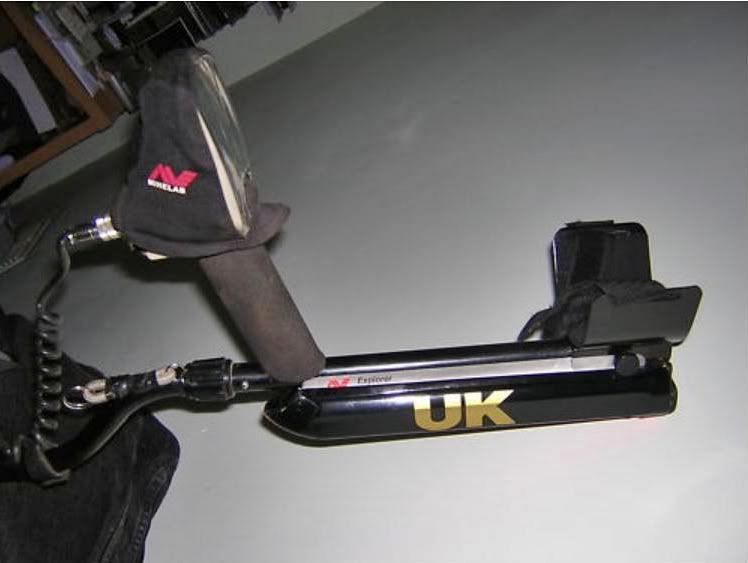
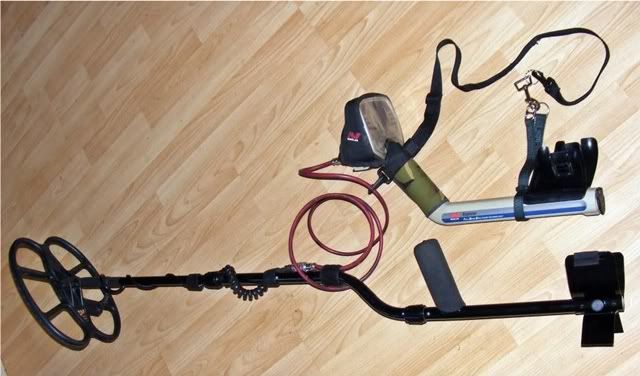
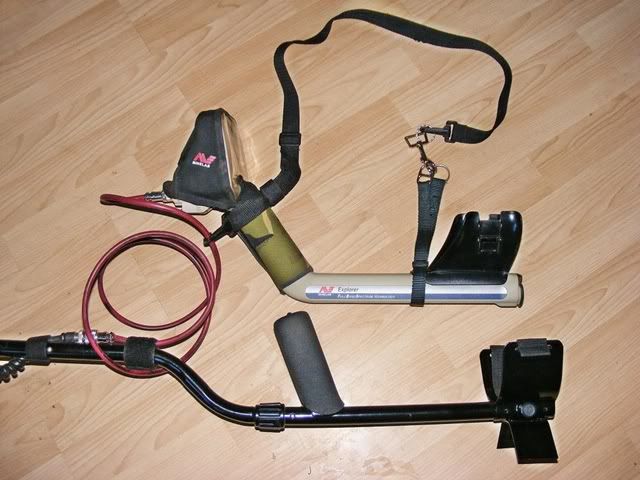
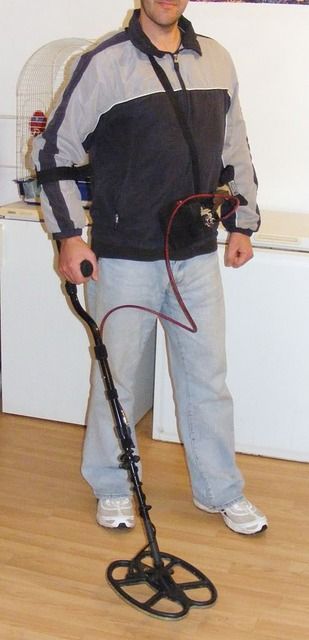
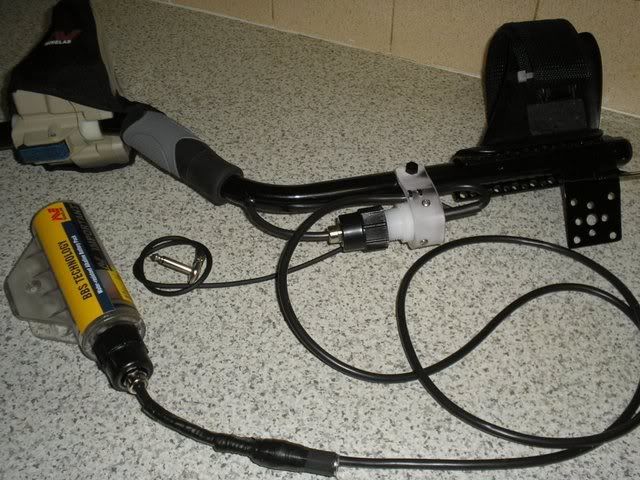
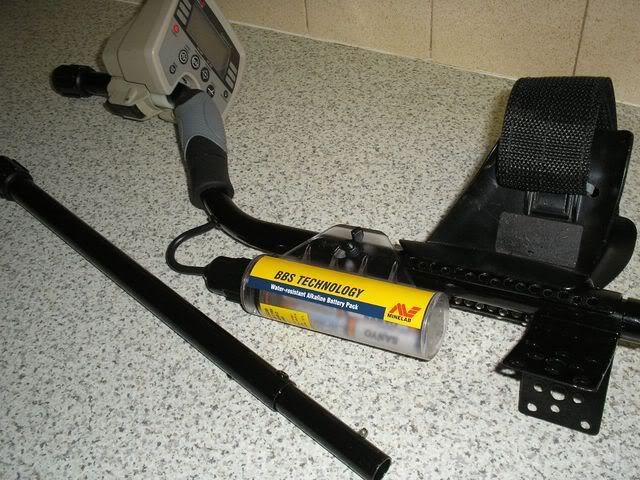

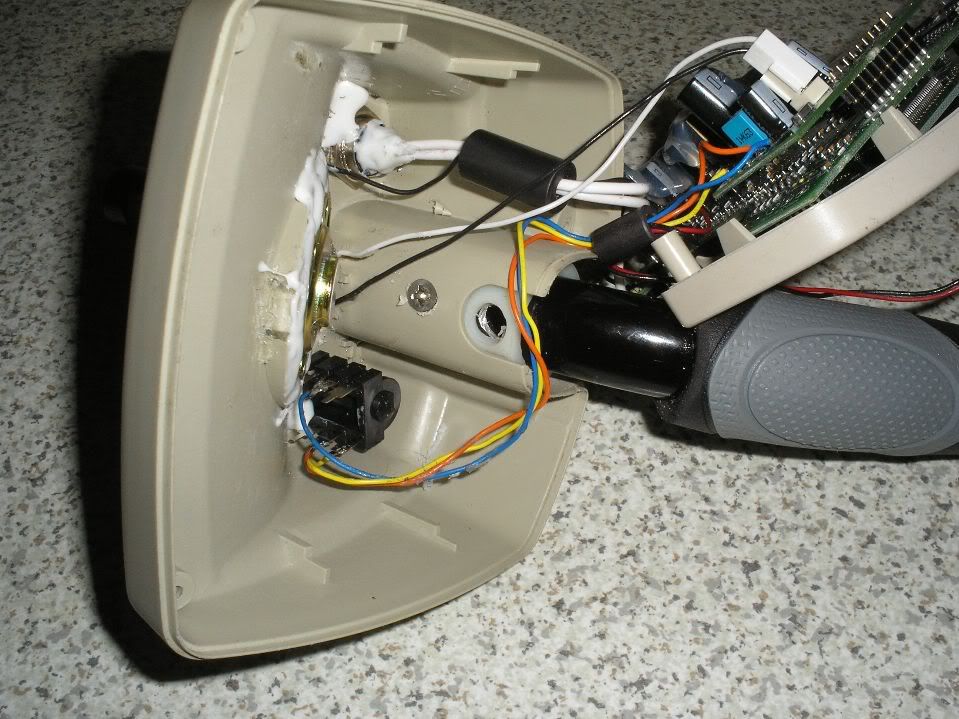
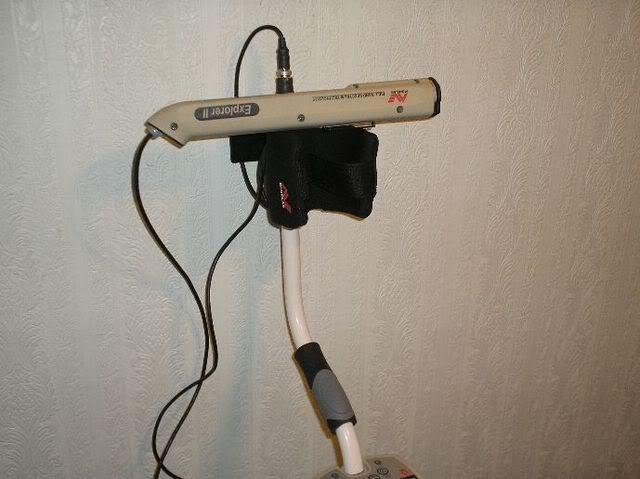


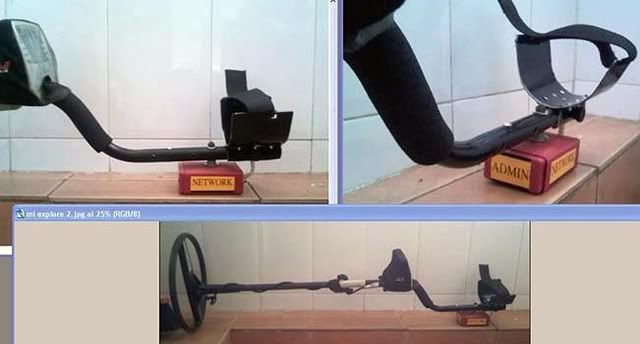

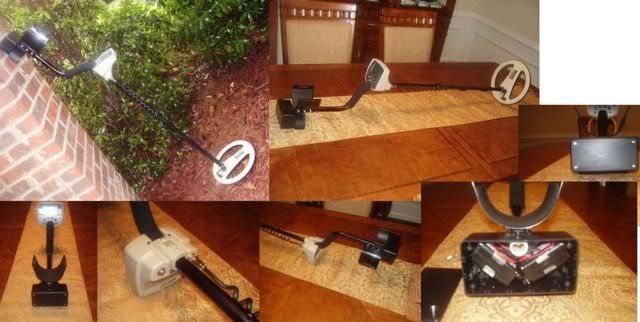
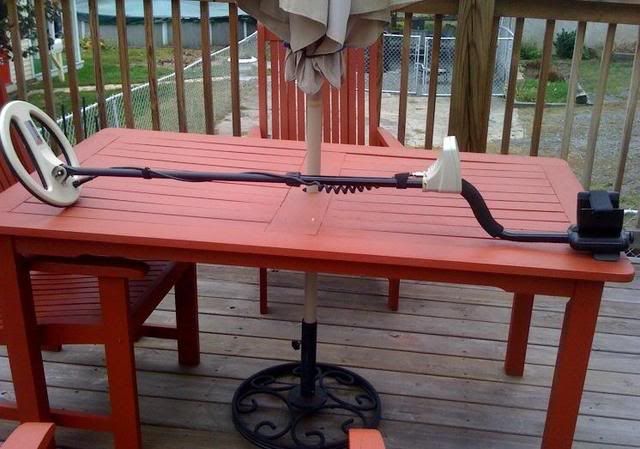

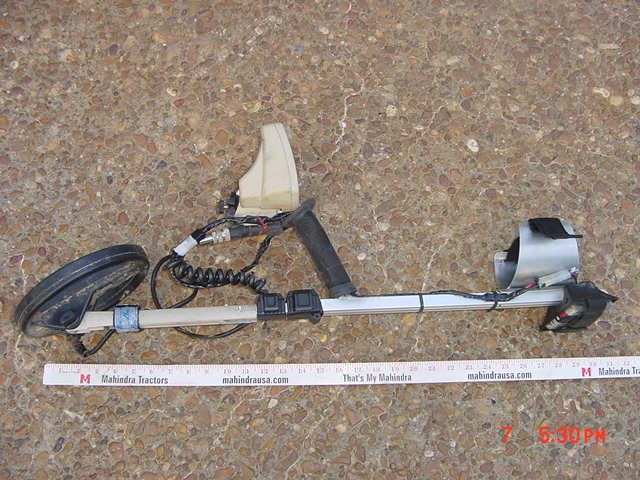
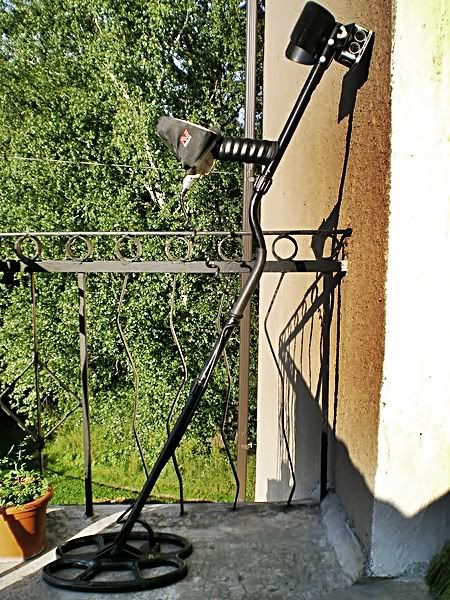
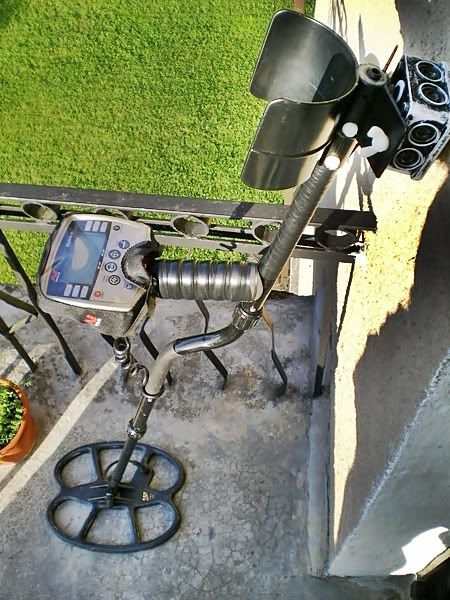
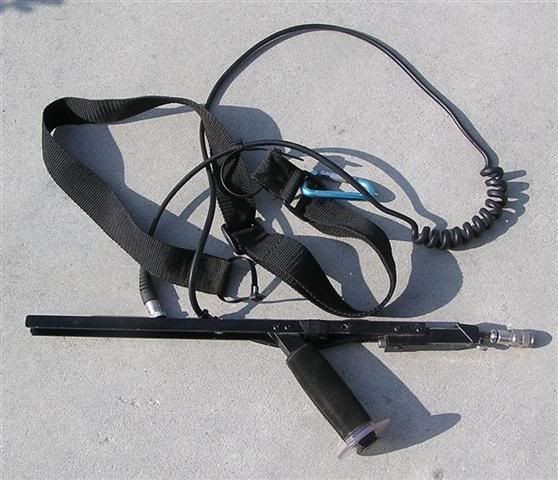
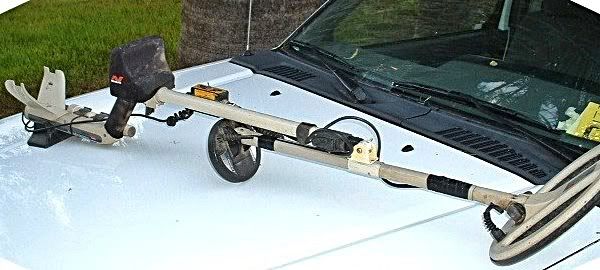
here is some pictures of some moded explorers for you lot to look at, it my help give some ideas on what ways to go with any modifacations you may have in mind.
i'm sure the last one must of been intended as a joke.....maybies not?.......


